Bright idea.....dim bulb
The idea of incorporating waterways onto the deck stuck in my mind like glue. the other thing I had given thought to, was the fact that a lot of the builds I saw, did their planking in solid strips....the plans doesn't give scale length dementions either....but that's O.K., I can figure it out. I had put on the rub rails and repaired as many defects in the hull as I could, but after the second priming, I still missed a couple. I will catch them when I do the final coat. at the same time as the rub rails, I also cut out the scuppers. the material used to create the bulwarks is a very thin plywood-like material....and very hard to cut without causing it to splinter. I could see that I will have some repairing to do after.
I started to put my idea of the waterways into action. I was going to create a sheet of wood strips, glued together side to side, and using the top rails as a template, I was going to trace them out on the wood sheet and cut them out from there.
the deck planking is of a thin mahogany material 0.5mm X 5mm. I want to later paint the waterways white to offset this and define the deck. for this reason, I chose to use some natural wood strips that I didn't use on the Nordkap. they are the same thickness as the mahogany strips. these strips of deck planking were to be used on the Nordkap deck, whereas I had goofed with the creation of it's waterways, so I had to use the extra hull planks {thank goodness I had enough}, to do it's deck. they were 1.8mm X 7mm......at 1:50 scale.....it wasn't too big of a goof. the Cux is only 1:33 scale, so a repeat of this goof is not an option. I used the pine board that the Nordkap came to me on, being a soft wood, it made for the perfect pin cushion. as I glued the strips together, I used a wet cloth to wipe the excess glue from the surface and dampen the wood for good glue penetration. pins kept the strips in perfect alignment and flat to the board, so the waterways I cut out later would conform to the deck. I had about eight strips glued together when I decided to remove the sheet from the board to see what it looked like, relating it to the deck......what was I thinking! in my endeavor to create this sheet, I had forgotten one very important aspect....never even gave it a thought, because when I went to remove it, I had found that I had also cemented it to the board as well! hard as I tried, I could not get it off there without it breaking off in jagged chunks! a word to the wise folks......don't try this at home!
meanwhile, back at the ship
now, with a botched plan under my belt, I decided to move along onto something else, while thinking up a "plan #2" concerning the waterways. I had bought some additional wood strips for the rub rails and set to work on those.
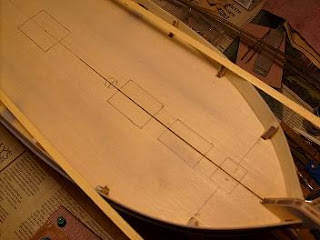
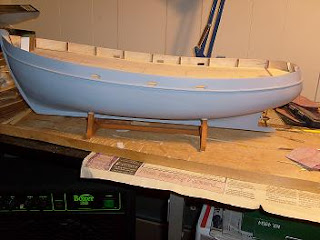
I had also installed the prop tube and put the prop in place for this last picture....it will be later painted black. by this time, I had come up with a plan #2 for the waterways, hoping that I had enough natural wood strips to do it. I will piece the waterways together, filling in any gaps that show up, to create the solid borders along the bulwarks. at the bow and stern, there will be pads extended for their central points. these will not be filled, so they can retain their planked look. I started at the stern from the center, outwards, using a piece of wood as a stop. I had already marked out where all the structures will be located, my intention is to plank around them, and not glue them on top of the planking.
when the stern was planked out, a border stop was cemented into place. the bulwarks were next, first the outer "runner" was installed and then the fillers were added.
one problem that I saw here, was that the runners could not go all the way to the bow line that I had drawn, but fell short at the second rib. continuing at this point, would put a lot of tension on the strip and cause it to twist. filling in this rib span would create a bisect line for the deck, a banking edge for the deck planking to run. I thought to put in an extra small piece here, in an effort to round up this turning point of the waterway, but decided not to, as it might just create another problem. I envisioned the deck in place and decided not to, thinking that I might be able to accomplish this at planking time.
I had planked the bow before I did the second ribs, bordering that off as well. you can see that it is not a dramatic angle, so I may be able to "round" the planking and fill it in afterwards. I test fitted the bow locker to see how it would look in it's new surroundings.
I will repair the scuppers at this time, along with the gaps and cracks along the bulwarks. once this is complete and painted, I can install the top rails. these make for the perfect anchor points for masking tape in order to paint the hull. I'm kind of glad that I don't have to create anchor boxes for this build, but at the same time, I wondered why there aren't any. it's just one more bit of character for this fine ship.
you know, it's funny.........I thought the stern was a horror show. but, it did come out rather well. The bow didn't come out too bad either.....I don't have a picture of it with the rub rails, I will include one with the next build log. again, I wish everyone a very Merry Christmas.....and a Happy New Year.....I hope 2011 brings good things to all!
MERRY CHRIS'MUS.........AK-K-K-K-K-K-K-K-K-K-K-K!


